

Trividia Blood Glucose Meter
Need help with your Trividia Blood Glucose Meter (BGM)? Find everything you need to know from set up to measurement best practices and troubleshooting. We’ve got you covered.
Jump To SectionHow It Works
Top Tips for Successful Measurement
Setup Before Use
Setup must be completed through Tenovi Web App by your Health Care Provider before the device can be used with the Tenovi Gateway.
- Add the Trividia Glucometer device type to the Tenovi Web App.
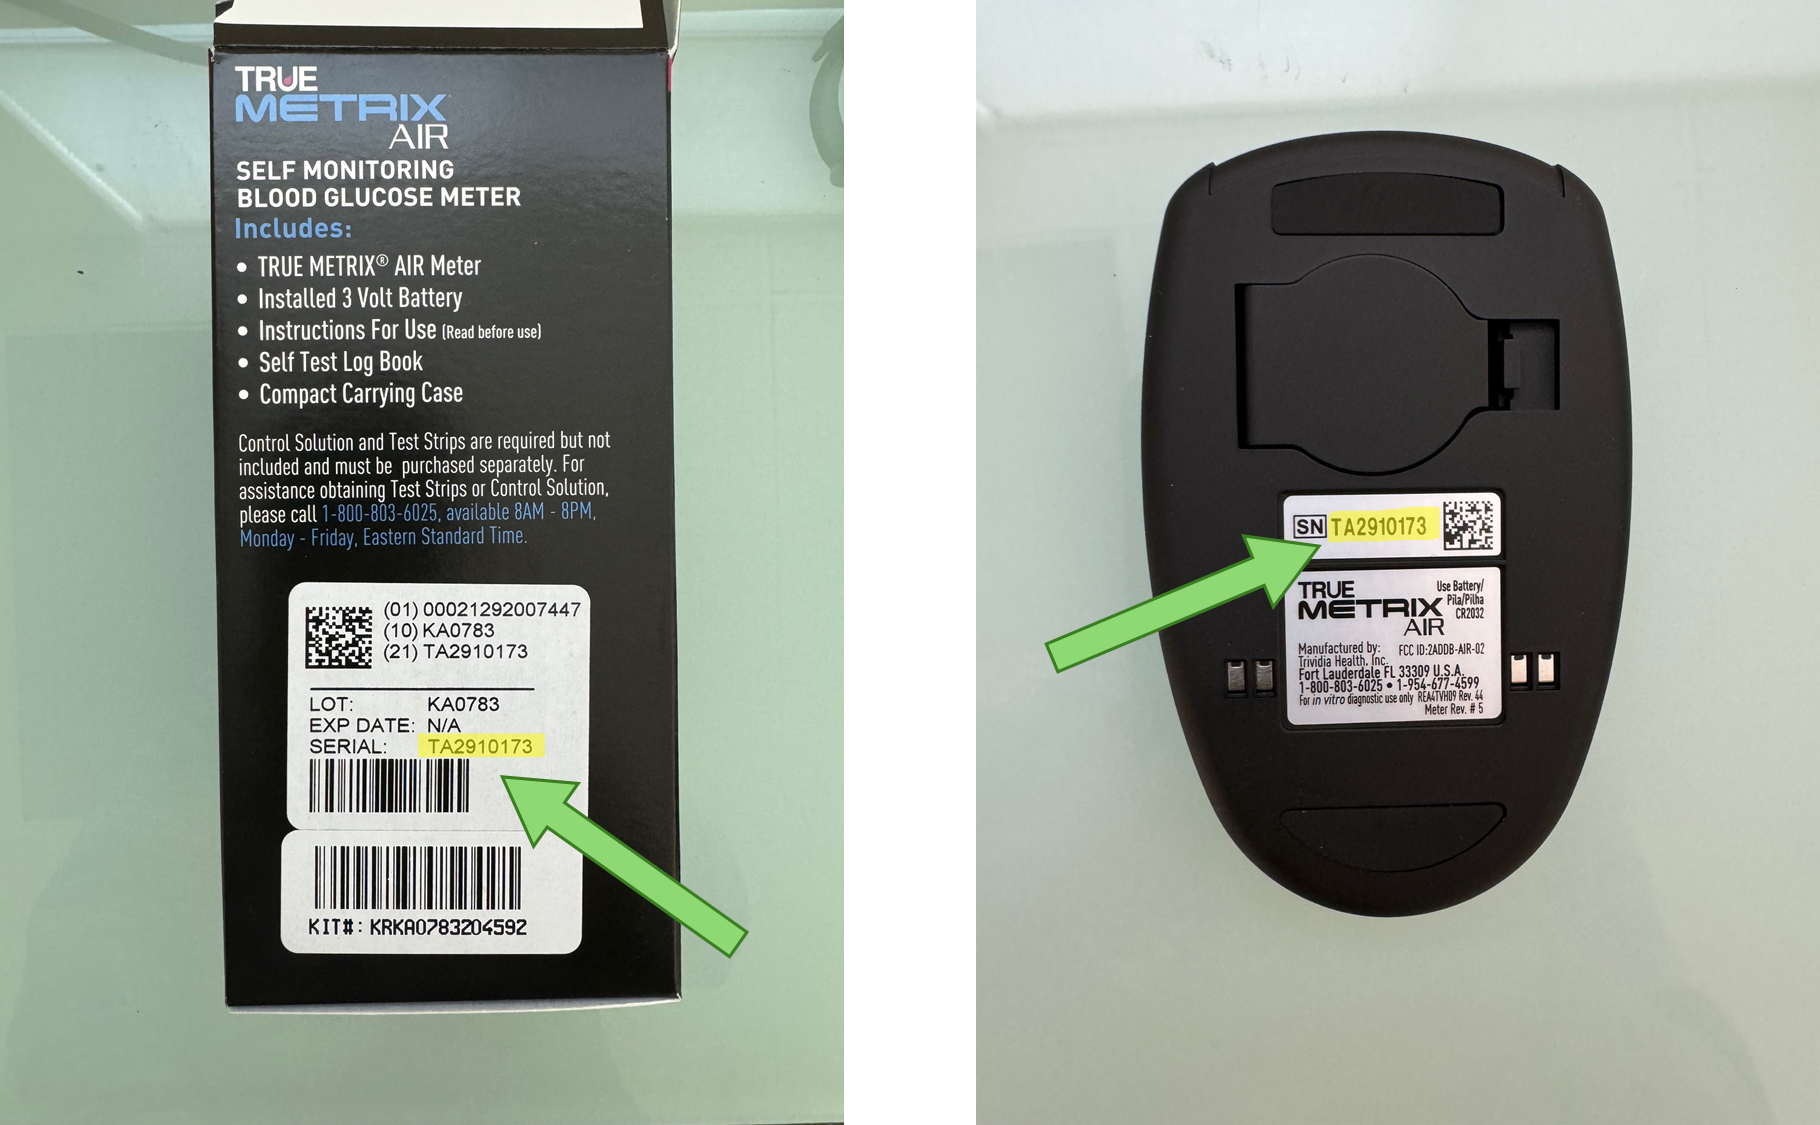
- Add the glucometer’s serial number as the Bluetooth passkey. Only include the numbers following the letters.
Successful Transmission
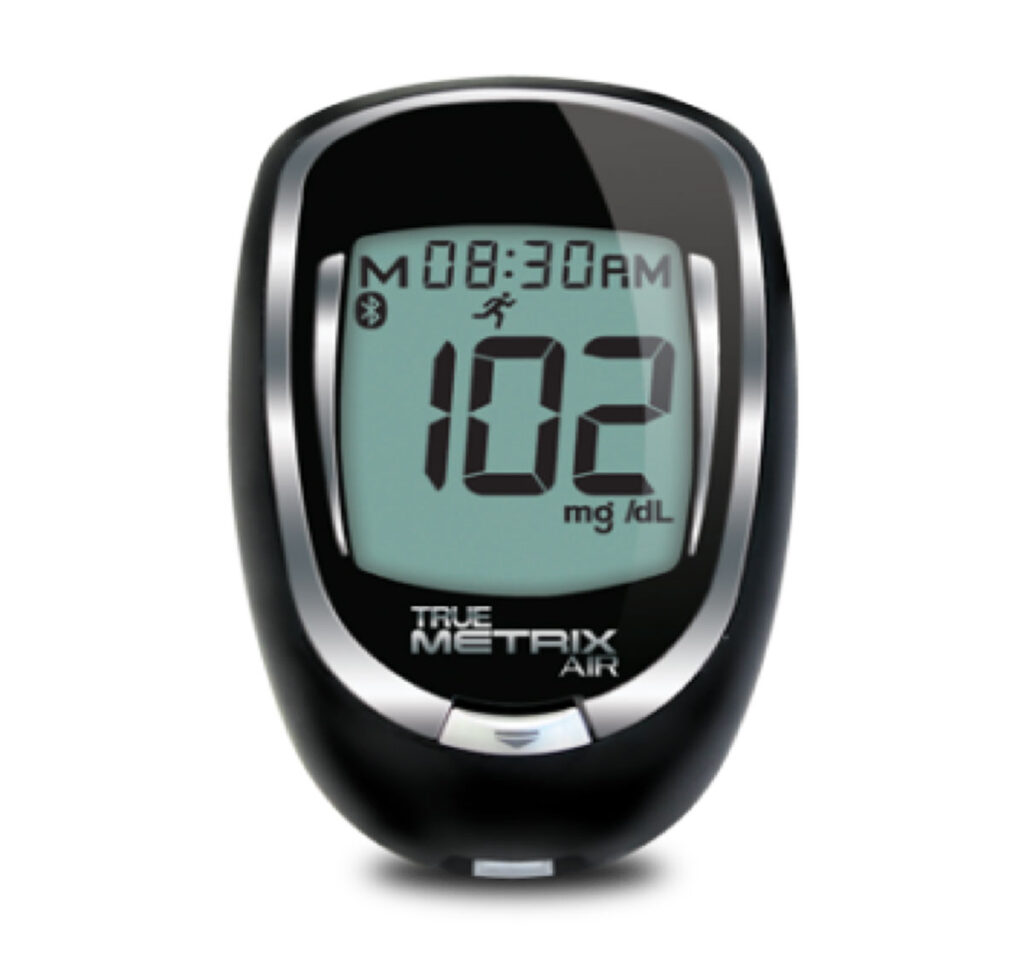
To successfully send your measurements to the Gateway, remove the test strip and push the middle button on top of the glucometer.
Accurate Measurement
Thoroughly wash and dry your hands before using your Trividia Glucometer.
Setup & Use Steps
Power Gateway
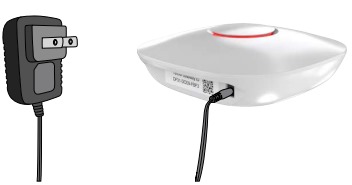
Step 1: Set up your Gateway by plugging it in. It will flash purple as it connects and then settle to a solid red color when it is connected.
Insert Batteries
Step 2: Insert batteries into the back of the glucometer. Stand within 10 feet of the Gateway and press the top button on the glucometer. The Gateway will beep indicating that it has connected successfully to the glucometer.

Preparation
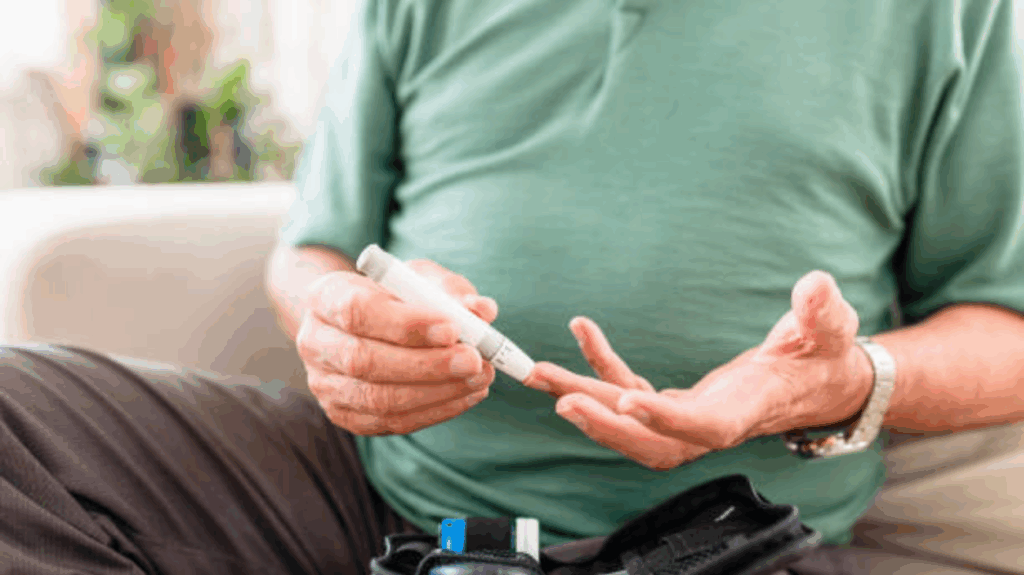
Step 3: Insert a test strip with the contact bars facing upwards into the meter’s test strip port. Insert a new disposable lancet firmly into the lancet holder.

Take A Sample
Step 4: Use prepped lancet to take a blood sample. Quickly apply the blood sample to the end of the test strip. When the measurement concludes, the results are shown on the display.

Transmit Readings
Step 5: Remove the test strip and the screen will turn off. Stand within 10 feet of the Gateway and press the power button on top of the glucometer to transmit the reading to the Gateway. You can take readings while away from the Gateway. Press this button the next time you are close to your Gateway to transmit all of your readings.

When Taking a Measurement
Before You Measure
- Wash your hands with soap and warm water to increase circulation. Dry thoroughly, as residual moisture can skew results.
- Consistency matters when tracking trends. Try to test at the same time each day and use the same general area, such as the sides of your fingertips.
- Cold hands can restrict blood flow to your fingertips. If you have trouble getting enough blood on the test strip, try warming up your hands before washing them.
Taking your Glucose Measurement
- Lancets are SINGLE-USE ONLY. Discard your lancet after each use.
- Don’t squeeze too hard as excessive squeezing can dilute your sample with interstitial fluid, which may affect accuracy.
- Ideal fasting blood glucose levels for most adults are 80–130 mg/dL before meals, and under 180 mg/dL after meals (2 hours).
- Always store strips in a dry place and close the vial immediately after use.
- If your results seem off, test with the manufacturer’s control solution to verify the device is working properly. The control solution test range can be found on the container of test strips.
Check the Accuracy of Your Glucometer
- In order to ensure your glucometer is providing the most accurate results, you may use the control solution to confirm accuracy.
- On the blue portion of the label of your control solution, it will state the control solution: Level 1, 2, or 3.
- Next, check the test strip bottle for the expected range for your control solution. This is not located on the control solution bottle but on the container that holds your test strips.
- If the glucose reading when testing the control solution is outside of this range, please contact support.
Error Codes
E-0
Invalid Hematocrit
Repeat with new test strip using capillary whole blood from the finger or forearm. If error persists, contact Trividia Customer Support.
E-1
Temperature Error Too Cold/Too Hot
Move meter and test strips to area between 41°F - 104°F; wait 10 minutes for system to reach room temperature before testing.
E-2
Sample not detected OR using wrong test strip
Retest with new test strip and larger sample.
E-3
Used test strip outside of vial too long OR Sample on top of test strip
Repeat with new test strip. Make sure Sample Tip of test strip touched top of sample blood drop. If error persists, contact Trividia Customer Support.
E-4
Meter Error
Contact Trividia Customer Support.
E-5
Test Strip error OR very high blood glucose result (higher than 600mg/dL)
Retest with new test strip. If error persists, contact your Health Care Provider.
E-6
Test Strip removed during test
Retest with new test strip. Make sure result is displayed before removing test strip.
E-9
Communication Error
Contact Trividia Customer Support.
![]()
If a battery symbol is displayed in the bottom left corner, this means the meter has a low or dead battery. Please replace battery as soon as possible. Replacement batteries can be order through the Tenovi Web App.
Low: About 50 tests can be done before battery dies.
Dead: Battery Symbol appears and beeps before meter turns off.
Device Specifics
Pairing and Bonding
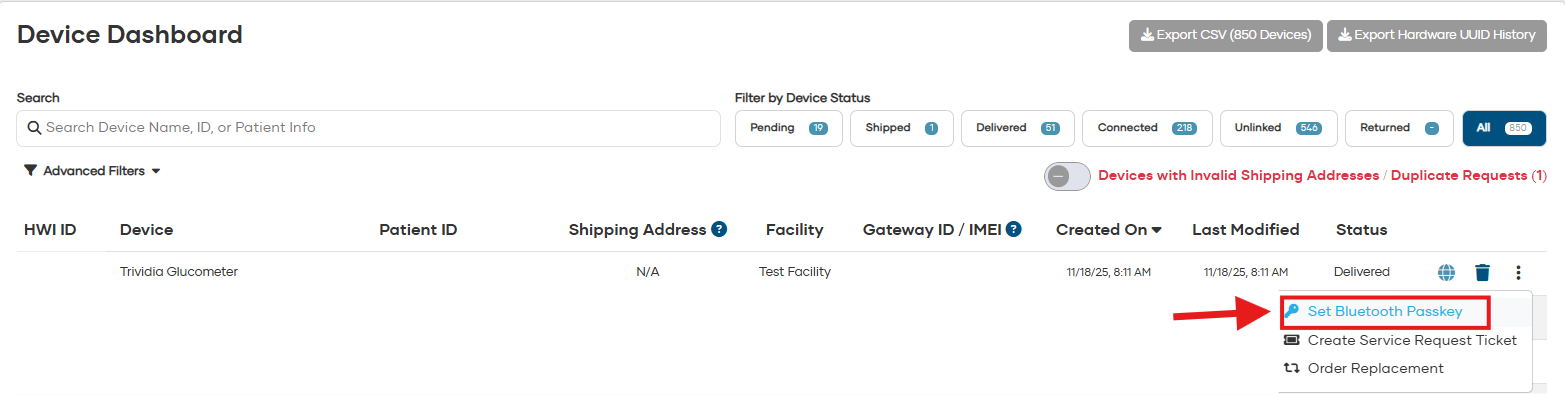
- Before this device can bond and send measurements to the Tenovi Gateway, your Care Provider will need to add the Bluetooth passkey to the Tenovi Web Portal.
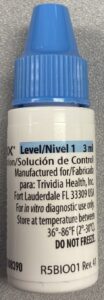
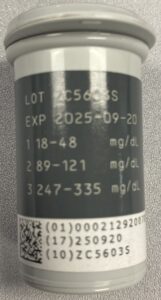
- After adding the Trividia Glucometer device type, you can enter the Serial Number as the Bluetooth passkey on the Device Dashboard. Only the numbers need to be entered; exclude the letters at the beginning of the Serial Number. (See Image 1 and Image 2 below)
- Push the middle button on the top of the glucometer to sync it to your Gateway.

Storage Events
- Trividia Glucometer will store up to 1000 readings. Old readings are not deleted
- When the glucometer is offloading large amounts of readings, it may be necessary to take a reading (test solution is fine) to engage the glucometer to offload data. Continue to use the glucometer as normal and the readings will offload with normal usage.
- Trividia Glucometer’s that are Rev 5 or higher will be compatible with Gateway firmware 2.134.30 and later. Using a Gateway or Trividia glucometer with an earlier firmware version may cause connectivity problems.


